

By EdCaptain editorial desk · Published
Contour lines let a flat map describe three-dimensional land. Each line joins places at the same elevation. A layered clay hill makes the idea visible because children can separate equal-height slices and trace their outlines.
Materials and setup
- Three or four colours of modelling clay
- Flat board or tray
- Ruler and paper
- Child-safe clay cutter or dental floss used by an adult
- Pencil and coloured markers
Build on a washable surface. Adults should make horizontal cuts when a tool is required. Never use wire or a kitchen knife with children.
Build equal-elevation layers
- Flatten the first clay colour to a uniform thickness.
- Stack another equally thick layer and repeat.
- Shape the stack into a hill without mixing the colours completely.
- Look from the side: every colour boundary represents the same vertical interval.
- Separate or slice along the colour boundaries.
- Place the largest bottom layer on paper and trace it.
- Centre each smaller layer in turn and trace nested outlines.
The traced outlines are a model of contour lines. Because the vertical step between layers is equal, closely spaced outlines show the land rising quickly over a short horizontal distance. Wider spacing shows a gentler slope.
Read the finished map
Mark the lowest line with zero and count upward by an invented interval, such as ten metres. The actual clay hill is not ten metres tall; the numbers practise how a map’s contour interval works. Draw a route to the summit and ask whether it crosses many close lines or follows a gentler side.
Make a second hill with one steep face and one broad slope. Keep layer thickness equal. Before tracing, predict which side will produce crowded lines. The comparison is strongest when only hill shape changes.
Common misunderstandings
A contour line is not a path, wall or colour band on real ground. Lines usually do not cross because one point cannot normally have two elevations. Every fifth line may be darker on a published map for easier reading, but the vertical interval remains consistent.
Age and access variations
Ages 6–9 can order layers and connect close lines with steepness. Ages 10–12 can label elevations and draw a cross-section. Teenagers can compare the handmade map with a real topographic map. Use soft clay, broad tools and pre-made layers for fine-motor access. Tactile outlines made with cord or raised paint can support touch.
Reflect and extend
- Where would water probably flow?
- Which route uses the gentlest slope?
- How would thinner layers change the detail?
- What does the model omit, such as vegetation or rock type?
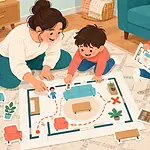
Start with a familiar overhead view in the room-map treasure hunt, practise distance through measuring games, or connect land and water with the three-dimensional water-cycle model.
Make a profile from the contour map
Draw a straight line across the nested contours. On a second sheet, mark every place where that line crosses a contour and write the corresponding elevation. Plot those heights above the baseline, then connect them smoothly. The result is a side-view profile along one slice of the landscape.
Compare the profile with the clay hill from the same direction. If they disagree, check whether layers shifted while tracing or whether the contour interval was labelled inconsistently. Children can then plan two walking routes: the shortest route to the summit and a longer route that avoids the steepest slope. This connects map reading with a real decision without implying the clay surface includes hazards, vegetation or trail rules. Keep clay out of mouths and wash shared tools before storing them.
For another challenge, build a saddle or valley and predict the contour pattern before tracing. Explain every prediction with the shape and spacing of the clay layers.