
A how-to demonstration gives a child something concrete to talk about: a skill they can show with their hands. The audience is not only listening. They are trying to understand the sequence well enough to do it later.
That makes demonstrations a useful bridge into public speaking, but only when the topic is small, safe and visible. “How to cook” is too broad. “How to fold a paper bookmark” or “how to plant one bean seed” is manageable.
Choose a skill that fits the room and the time
Invite your child to list things they genuinely know how to do. Good choices can be completed, or shown in prepared stages, within the available time. They should use materials that are easy to carry and safe for the setting.
Avoid flames, sharp tools, risky ingredients, live animals or equipment that needs specialist supervision. Check allergies before any food activity. An adult should control any heat, cutting or other hazard, and a safer topic is often the better speaking task.
Plan backwards from the finished result
Ask your child to perform the skill once slowly while you write down each action. Then look at the finished result and work backwards: What must the audience know before the first step? Which part is easy to miss? What would make someone unable to copy it?
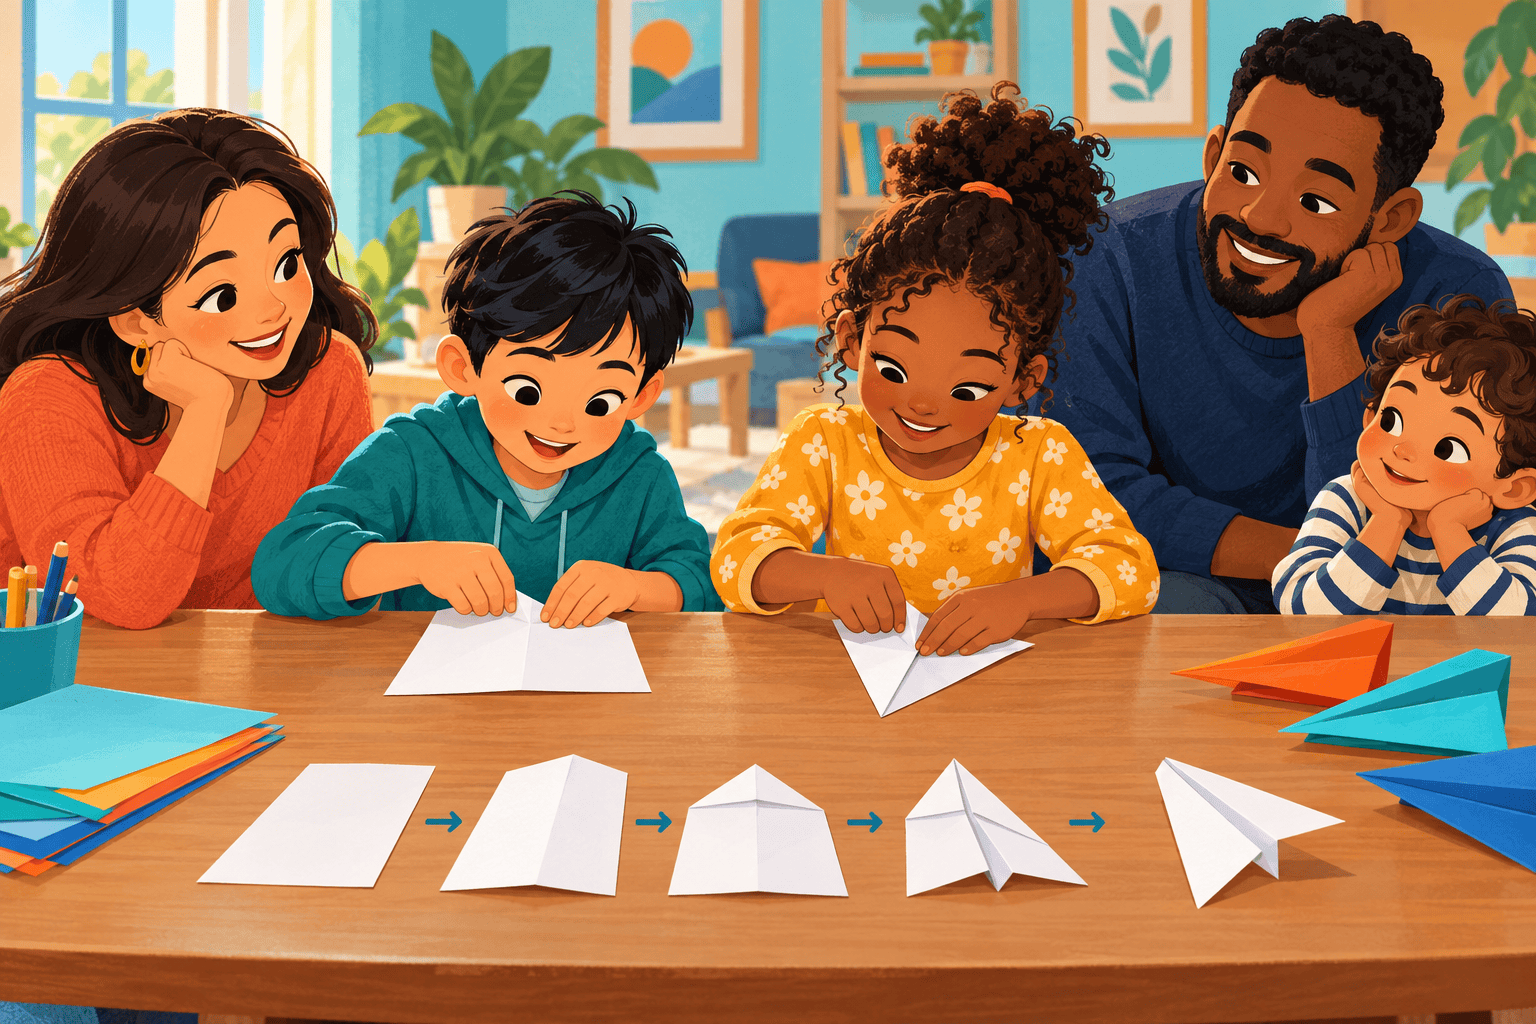
Group tiny actions into three to six meaningful stages. For a paper airplane, “fold the top corners to the centre” is more useful than narrating every movement of every finger. For older children, add a brief explanation of why a step matters.
Use a simple demonstration structure
- Show the goal. Hold up the finished item or describe what the audience will be able to do.
- Name the materials. Display only what is needed and mention any safety rule before beginning.
- Show one stage at a time. Keep hands visible, pause after key actions and explain while the action can still be seen.
- Check understanding. Ask whether the audience can see, or invite them to repeat the next step in their own words.
- Close the loop. Show the result again, recap the stages and invite questions.
If the audience will copy along, allow much more time. Prepare extra materials and decide what happens if someone falls behind. The demonstrator can pause, repeat or ask a helper to support individuals.
Arrange props so they support the explanation
Lay materials in the order they will be used. Keep unused items to one side and move finished items away from the main work area. If a stage takes too long, prepare examples in advance, such as one seed pot filled with soil and another showing the final depth.
Make sure the smallest important action is visible from the farthest seat. A close-up camera, large model or small audience gathered safely around a table may work better than a poster. Visuals should add information, not repeat every spoken word.
Practise the difficult moments
A rehearsal should include the props, timing and possible mishaps. What if paper tears, a piece rolls off the table or the finished example does not work? A child can say what happened, replace the item and continue. Calm recovery often teaches more than a flawless run.
Practise speaking before and after noisy equipment rather than over it. If the room is large, use a microphone. Ask a test listener to stand at the back and say which step was hardest to see or follow.
Respond honestly to questions
Teach your child that “I’m not sure” is a responsible answer. They can add, “I can check,” or “That might be another method.” Questions are not a test of whether the speaker knows everything.
Afterwards, ask whether the steps were in a logical order, whether the audience could see, and what the child would change next time. Keep comments specific and begin with what worked. The family can also practise giving feedback without sounding mean.
Easy demonstration ideas
- Fold a paper bookmark or simple airplane.
- Pack a school bag using a checklist.
- Create a simple hand-clap rhythm and teach it to the group.
- Plant a seed in a small pot, with an adult managing soil hygiene and cleanup.
- Tie a basic knot using thick, easy-to-see cord.
- Sort household recycling according to your local rules.
The same planning habits can support everyday leadership. EdCaptain’s article on directions people can actually follow helps children name the goal, show the first step and check understanding.