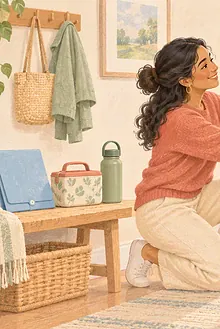


A lunch box is part container, part temperature plan. The right choice depends on what the child eats, how long food waits, whether refrigeration is available and whether the child can open and close every part. Start with a real packed lunch rather than choosing by size, character or the number of compartments.
- Ask the school what happens after drop-off
- Choose insulation for the food
- Pack the proposed lunch before buying
- Test what the child can manage
- Inspect cleanability
- Think about leaks and separation
- Run an at-home temperature trial
- Connect gear to the menu
- Review after one school week
- Choose the bottle and utensils as a system
- Sources and further reading
Ask the school what happens after drop-off
Find out whether lunches are refrigerated, stored in a cool room, left in bags or carried outside. Ask how long it is from packing to eating and whether children can refill water. A box that works for a short refrigerated morning may be inadequate for hours in a hot classroom or vehicle.
Choose insulation for the food
Perishable foods need temperature control. USDA guidance recommends an insulated lunch box with room for two cold sources, positioned around the food. If the child takes hot soup or stew, use a purpose-built insulated container and follow the manufacturer’s preparation instructions. A decorative fabric sleeve is not necessarily an insulated food container.
Pack the proposed lunch before buying
Arrange the actual containers, bottle, utensils and two cold sources on a table. Measure the group, then check internal dimensions rather than only the advertised capacity. Leave enough room for air and easy removal; overstuffing can prevent the zipper from closing and make spills more likely.
Test what the child can manage
- Can they recognise which side opens?
- Can they operate the zip, clip and bottle without using teeth?
- Can they lift the full bag safely?
- Can they reseal leftovers?
- Can they tell a teacher if a container is leaking or food seems unusually warm?
For limited grip, vision or coordination, compare large pulls, contrasting colours, stable bases and fewer separate lids.
Inspect cleanability
Look for smooth seams, a wipeable lining and removable inserts. Deep fabric folds can hold crumbs and moisture. Check whether the whole item is washable or only the interior. The box must open wide enough for an adult to see spills. Choose a bottle and food containers that can be fully disassembled and dried.
Think about leaks and separation
Place wet foods in sealed containers rather than relying on the lunch box itself. Keep raw ingredients out of a child’s ready-to-eat lunch unless they are prepared safely. Use a separate barrier for an ice pack if condensation would damage paper or medication. Label the outside without displaying the child’s full name publicly.
Run an at-home temperature trial
Pack the box as it would be for school and leave it for the same number of hours in a comparable environment. Use a food thermometer if you need to verify temperature; do not taste food to test safety. If the setup cannot keep perishables appropriately cold, change the food, add suitable cold sources or use available refrigeration.
Connect gear to the menu
A safe box does not make every meal appealing. Use the balanced school-lunch guide to plan realistic portions and familiar foods. For outages or unreliable refrigeration, consult the power-outage food-safety checklist rather than guessing.
Review after one school week
Look for food returning warm, crushed containers, leaks, odours and parts the child avoids. Ask what was hard to open and whether lunch time was long enough. The best lunch box is not the most elaborate; it is one that supports the required temperature plan and can be cleaned, carried and used by the child every day.
Choose the bottle and utensils as a system
A heavy bottle attached to a light lunch bag may tip or strain the handle. Check that cutlery has a secure, cleanable place and that sharp adult utensils are unnecessary. If the child uses adapted handles or straws, make sure the pieces fit without crushing food or preventing closure.
Teach the child which foods should stay cold and not to save a perishable lunch for the journey home when it has been warm for hours. School staff can help only if the family explains the plan and the child can recognise their own containers.