

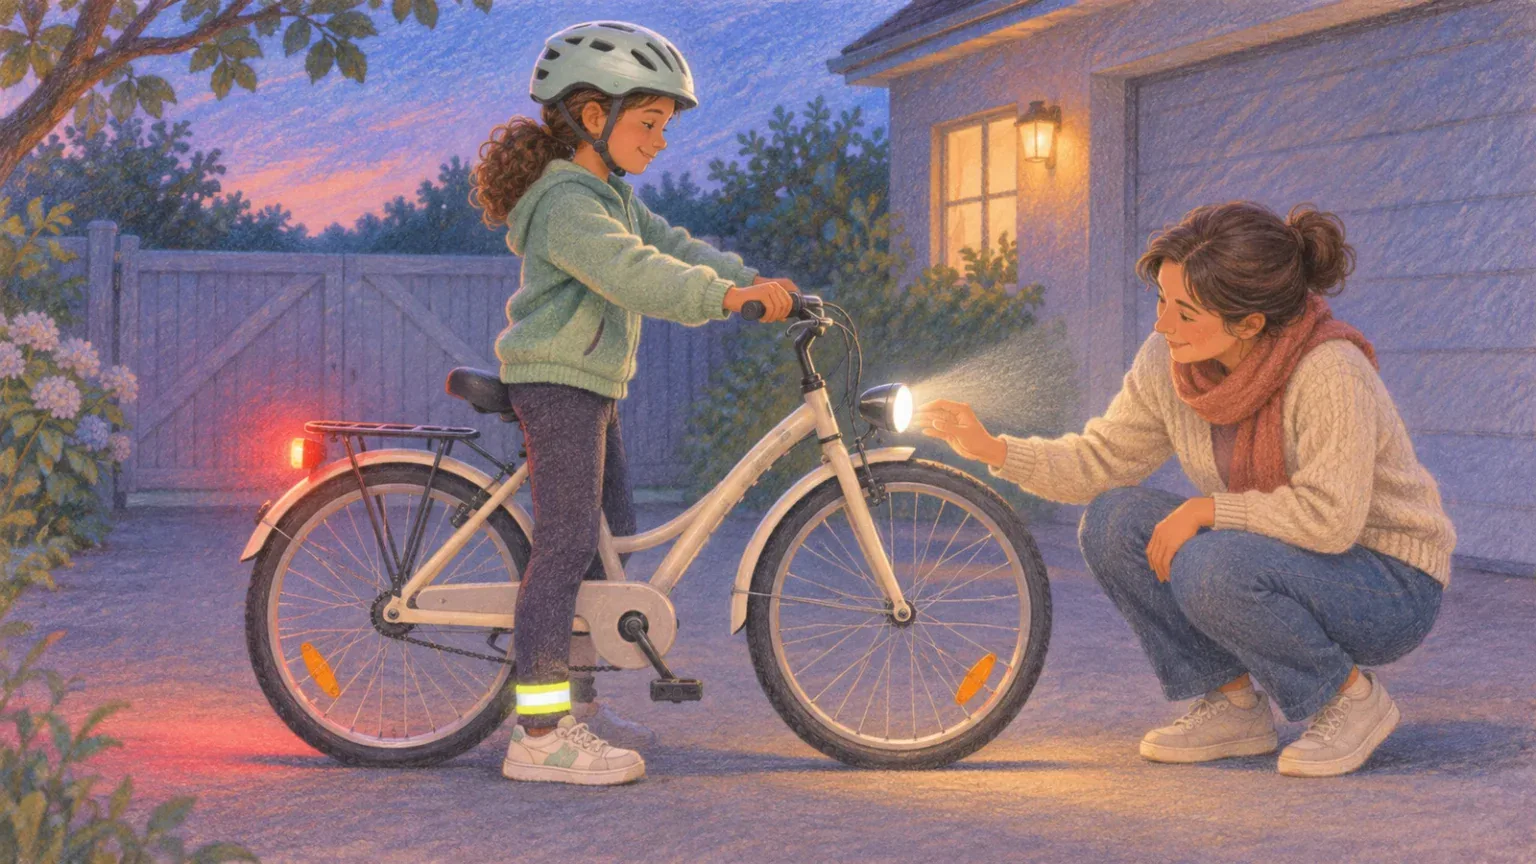
Bright colours can help, but being noticeable to a driver depends on contrast, angle, weather and whether equipment is working. A child who rides near dusk needs active lights as well as reflectors, and the family needs a routine for checking them before every ride.
Start with the route and the law
Walk or ride the usual route together. Note shaded paths, tunnels, crossings, parked cars and places where the child approaches traffic from the side. Then check local bicycle law for required front and rear lights and reflectors. The US Consumer Product Safety Commission’s bicycle rules set equipment requirements for bicycles sold in the United States, but state and local riding rules may add more.
Children should not ride after dark until they have the judgment, skills, supervision and legal permission needed for the route. Lights improve visibility; they do not make a hazardous route safe.
Build a front, rear and side system
- Front: a white light aimed to illuminate the route without dazzling other road users.
- Rear: a red light clearly visible from behind, mounted where clothing or a bag cannot cover it.
- Side: wheel or pedal reflectors and reflective details that show the bicycle’s movement at junctions.
- Rider: reflective bands or panels on moving ankles and legs can add visibility.
Do not use a phone flashlight as the main bicycle light. Choose weather-resistant equipment with mounts that cannot rotate into the wheel. A helmet-mounted light may move with the rider’s head and should supplement, not replace, lights fixed to the bicycle.
Test from a driver’s viewpoint
- Fit the lights and reflective gear in daylight.
- At dusk, have an adult stand at the approach to the driveway or route.
- View the child from the front, rear and both sides.
- Ask the child to turn, signal and pedal while the adult watches.
- Adjust anything hidden by a coat, basket or backpack.
Never conduct the test in moving traffic. Use a closed area and adult supervision. The National Highway Traffic Safety Administration advises riders to be predictable, obey traffic rules, and use lights and reflective materials to increase visibility.
Choose controls a child can manage
The switch should work with cold fingers or gloves. If a light has several flashing patterns, agree on a simple setting that meets local rules and does not distract the rider. Rechargeable lights need a predictable charging location; replaceable batteries need secure covers that children cannot casually open.
For a full equipment review, use EdCaptain’s bike equipment safety check. A correctly fitted helmet is also essential; see the child bicycle helmet fit guide.
Create a ten-second pre-ride check
Before each ride, press the front and rear switches, look for a steady mount, and confirm the lights are not covered. Check charge level after the ride so a nearly empty battery is not discovered at departure. Clean mud from reflectors and lenses. Replace cracked mounts and water-damaged units rather than improvising with loose tape near moving parts.
Visibility is only one safety layer
Use a safe route, an appropriate bicycle, a fitted helmet and adult supervision. Teach the child to stop and look at crossings, signal before turning and avoid headphones that block important sounds. If weather or light makes the route hard to see, choose another way to travel.
Repeat the visibility test when seasons change, because coats, school bags and earlier sunsets can alter what drivers see. Keep a small charging reminder near the bicycle storage area. The child can take responsibility for switching lights on, while an adult remains responsible for deciding whether the route and conditions are safe.